€ 0,00
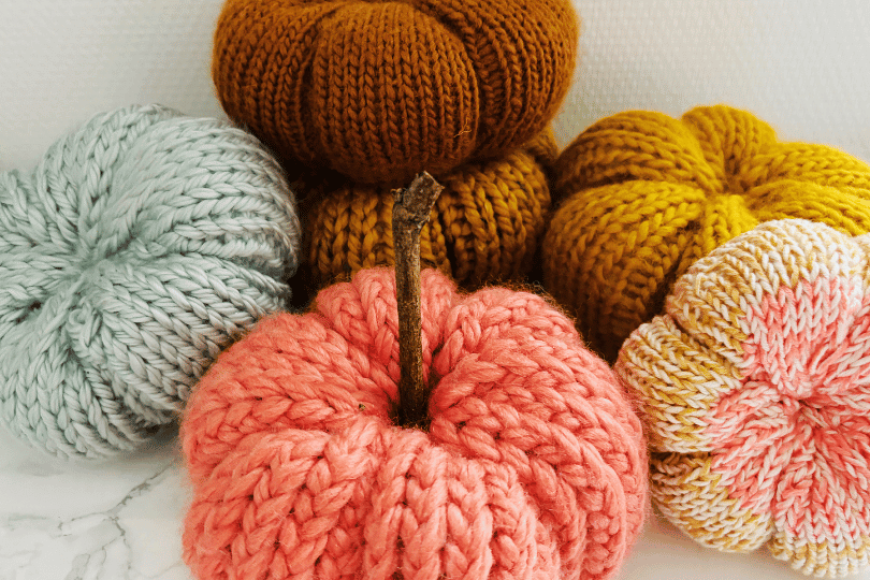
Gratis breipatroon: Pompoen
De herfst is het seizoen van gezellige truien, vallende bladeren, en natuurlijk: pompoenen! Als je van breien houdt en wat van die herfstige charme in huis wilt halen, waarom probeer je dan niet je eigen pompoen te maken met een gratis breipatroon? Of je nu je huis wilt decoreren of je voorbereidt op Halloween, pompoenen zijn onmisbaar in deze tijd van het jaar. Dit leuke en feestelijke project is perfect om een handgemaakte touch aan je seizoensdecoratie toe te voegen én om de schoonheid van de herfst te vieren.
De herfst is een seizoen van transformatie, waarin de natuur zich tooit in een schitterend palet van warme tinten—diep rood, goudgeel en gebrand oranje—voordat de winterkou haar intrede doet. De lucht wordt frisser en de geur van gevallen bladeren vult de atmosfeer, wat een gevoel van nostalgie en geborgenheid oproept. Het is een tijd voor dikke truien, warme drankjes en de troostende smaken van seizoenskruiden. De herfst brengt ook een gevoel van bezinning en voorbereiding met zich mee, wanneer de oogst wordt binnengehaald en huizen worden versierd met symbolen van het seizoen, zoals pompoenen en kalebassen. Of het nu het geluid is van knisperende bladeren onder je voeten of de aanblik van een oogstmaan, de herfst nodigt ons uit om te vertragen, te genieten van kleine dingen en de veranderingen om ons heen te omarmen.
Benodigdheden
Om deze pompoen te maken, heb je nodig:
- Dikke wol: ik gebruikte Katia Canada of een vergelijkbaar garen
- Breinaalden nr. 11 met een kabel van 20 cm/25 cm
- Schaar
- Stopnaald
- Vulling
- Optioneel: houten stokje of leren label
Afkortingen
- r = recht breien
- av = averecht breien
Gratis breipatroon: Pompoen
- Zet 36 steken op je naald + de extra lus van de opzetknoop. Sluit de toer.
- Toeren 1 – 18: brei 5 steken recht, 1 steek averecht, herhaal dit patroon. Je hebt nu 6 ‘delen’ met 5 rechte steken, gescheiden door 1 averechte steek.
- Kant af door een heel lange draad van het garen af te knippen. Rijg de draad door alle steken op je naald en kabel.
- Laat vervolgens de steken van je naald glijden. Trek de draad stevig aan om de onderkant van de pompoen dicht te trekken.
- Begin nu beetje bij beetje de pompoen te vullen!
- Steek de draad door de binnenkant van de pompoen naar boven. Rijg de draad door de steken aan de bovenkant.
- Vul de pompoen verder voordat je de bovenkant helemaal dichttrekt.
- Gebruik de resterende draad om langs de averechte steken banen over de pompoen te maken. Dit doe je door bij elke averechte rij de draad aan de bovenkant naar beneden door de pompoen te trekken, strak aan te trekken, en zo de ‘naden’ van de pompoen te vormen. Herhaal dit steeds bij tegenoverliggende parelkolommen om een mooie, gelijkmatige vorm te krijgen.
Deel jouw pompoen op Instagram door mij te taggen! Gebruik @crochetbakerycom 🙂
Veel breiplezier!